|
OUR
BIRDROOMS |
 2010 |
|
OUR
BIRDROOMS |
2010 |
2010 Birdroom
.JPG)
 |
 |
.JPG)
|
|
|
 |
 |
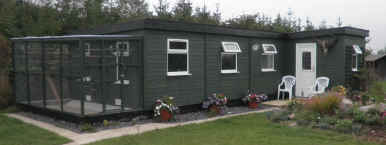
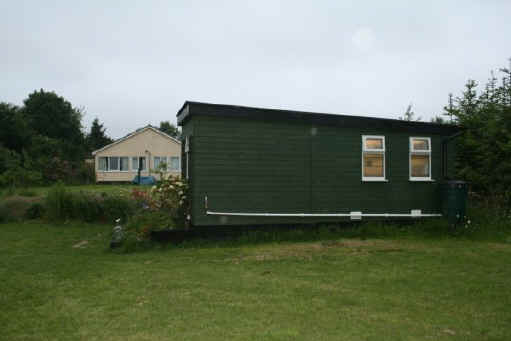
| 1993 – 2009 Birdroom I HAVE always been an advocate of trying to make things easy in birdroom management so that the time spent in the birdroom is more for the birds than the mundane routine jobs. Moving house in 1990 and aiming to start from scratch in the birdroom provided me with the opportunity to re-evaluate my needs in the birdroom with making things easy being uppermost in my mind. Having a partner, Janice, already an established breeder/exhibitor, who successfully attained intermediate status before we entered into partnership in 1990, makes life a bit difficult because I can not always have things my way and a compromise has to be reached. When a decision on the design of the birdroom, made of timber structure on a concrete base, was reached and having it built, the method of lining the birdroom was then the next step to consider. The cheapest way of lining would be either with hardboard or thin ply then paint; the latter needing to be maintained on an annual basis. I, as I said before, want things easy in the birdroom so lining had to be a material easy to clean and maintain; contiboard. Most DIY/woodyards have the 12mm or 15mm thickness contiboards which for lining is rather expensive, wasteful and add that extra weight to the building structure. I wanted something thinner with a melamine face on one side only. This proved to be a bit difficult to find initially but after many phone calls I was able to locate a firm in Kent which specialises in contiboards and also have boards of 8mm thickness and of 230 x 150 mm (9' x 6') dimension. I also do not like white painted birdrooms as it gives a surgical appearance and it is a cold colour. My ideal colour of a birdroom is beige, which is a warm soft colour. Unfortunately Janice prefers white.
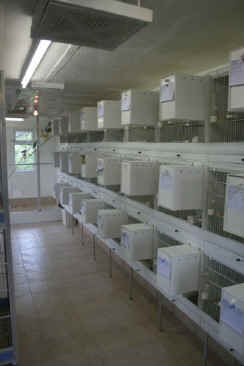
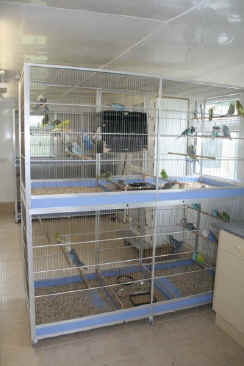
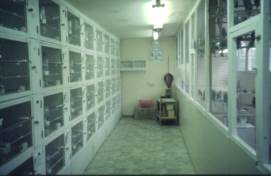
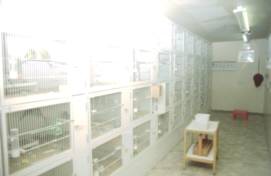
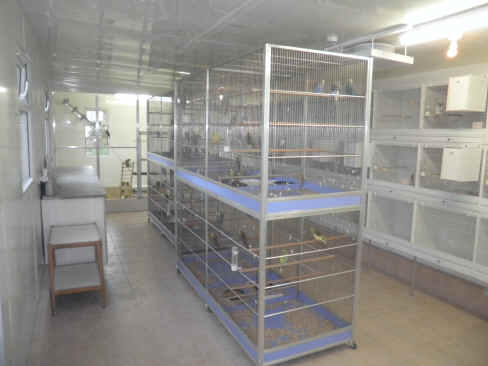
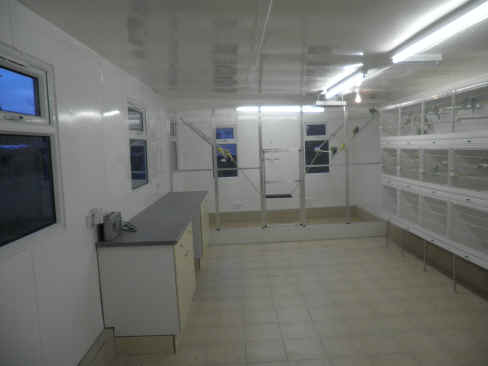
The cages were next to consider. We had to use our old cages for two breeding seasons while I was searching for a joiner who was also a bird fancier to make up the cages to our design. I felt that a bird fancier would understand much better our requirements. I found such a person, Shaun Taylor, and a price for the forty cages was agreed. These cages to be of 760 x 460 x 380 mm (30"x18"x15") deep and again of 15mm contiboard but in white. They were to be in units of 3 cages across and 4 up with show cage storage space below. When the sliders are removed the row will be converted to nearly 2.4 m (8') long stock cage. Three of these units and a one upright single cage unit gave us a total of 10 cages across and 4 cages up. The backing to be of white faced hardboard. Both of us agreed that the cage front need to be removed easily for cleaning so the cage front is situated in a frame and secured to the cage base by two doweling. At the top the frame is kept in place by two plastic turn catches and a stopper behind the frame. Also we wanted the nestboxes to be concealed and removed easily when not in use without taking cage space. This was achieved by having double runners at the top of the nest box and cage ceiling. Furthermore there is a door on hinges the width of the nest box and the entire height of the cage. This will avoid unnecessary knocking of the nest boxes when fixed to the outside. The runners are both screwed and glued for further security.
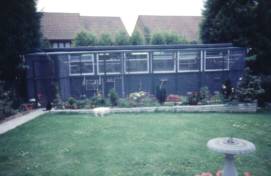
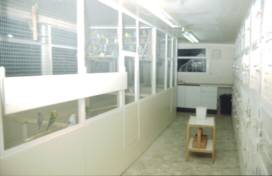
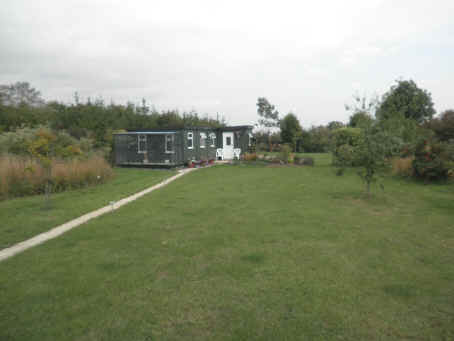
For many years we have used wooden trays to house the various size plastic dishes for the breeding cage. We had to replace or repair a few every year and they looked ugly. Again there were plastic trays, with their own dishes, available on the market and we obtained forty. The birdroom is facing north east as this how the bottom of the garden is facing. Also when we designed the birdroom there was already a path to the left hand side of the garden, so instead of the conventional way with the door is in the middle of the birdroom, in our case it is to the left hand side. The whole front was made in 7 sections each of 1.2 x 2.3 m (4' x 7.5') with a window in each of the six panels and the last panel contains the glass door. This made the room very well lit but on reflection this may not have been a good idea for the breeding season. Electricity & water were run to the birdroom with the sink fixed to the left hand side of the birdroom. This now gave us a 7.3 m (24') space for inside and outside flights so we divided this space in 3 equal parts. The first flight nearer the door can be used as a baby flight, then to separate the hens prior to the breeding season and for the sales birds. The other two flights are merged in one for the adult birds where cocks and hens fly freely. Our outside flights are not covered as we feel that the birds benefit from the rain. The floor of the outside flights is covered with shingle. We utilised the wasted space below the perches in the inside flights by building storage cupboards at each end.
Copyright © Ghalib Al-Nasser 2002 all rights reserved. |